A concrete pad for shed storage is one of those jobs that looks simple until the building starts settling, a door sticks, or rainwater runs under the walls. The shed may be small, but the pad carries every tool, mower, shelf, workbench, and load you put inside it. In South Texas, the ground preparation and drainage work below the concrete matter just as much as the finished surface you see.
For a pad that stays level and useful, start with the site, build a stable base, use the right slab thickness, and plan for water before the truck arrives. Cutting corners on any one of those steps can turn a straightforward project into an expensive repair.
Plan the Concrete Pad Around the Shed and Site
A shed pad should be sized for the structure you are installing, but a little extra concrete usually pays off. Extending the pad beyond the shed walls by several inches gives the building a cleaner bearing area and helps keep roof runoff from washing directly against the slab edge. It also makes installation easier and provides a firm surface around the doorway.
Before choosing dimensions, confirm the shed manufacturer’s foundation requirements. Some prebuilt sheds are designed to sit directly on a slab, while others require anchor locations, a specific perimeter layout, or clearance for skids during delivery. If you are building a workshop-style shed with heavy equipment, a vehicle, or wall-mounted storage, plan the pad for those loads rather than treating it like a basic garden shed foundation.
The location needs just as much attention. A low spot in the yard may be convenient, but it is rarely a good place for concrete. Water should move away from the shed, not collect around its perimeter. In Corpus Christi and other Coastal Bend communities, heavy rain, flat lots, sandy soils, and changing moisture conditions can expose poor grading quickly.
A qualified contractor will look at the existing slope, nearby downspouts, tree roots, utility lines, access for equipment, and the path a concrete truck may need to take. These details affect the price, but they also determine whether the finished pad performs as intended.
Leave Room for Drainage
The slab surface should have a controlled slope so water sheds away from the building. The exact approach depends on the site and the shed layout. A pad does not need a dramatic pitch, but it cannot be perfectly flat if water has nowhere to go.
Avoid directing runoff toward a fence line, neighboring property, an exterior wall, or a garage. If the site has a recurring drainage problem, the right answer may include regrading, a swale, or another drainage measure before the pad is placed. Concrete is durable, but it cannot fix water that has been given no path out.
Build a Base That Will Not Move
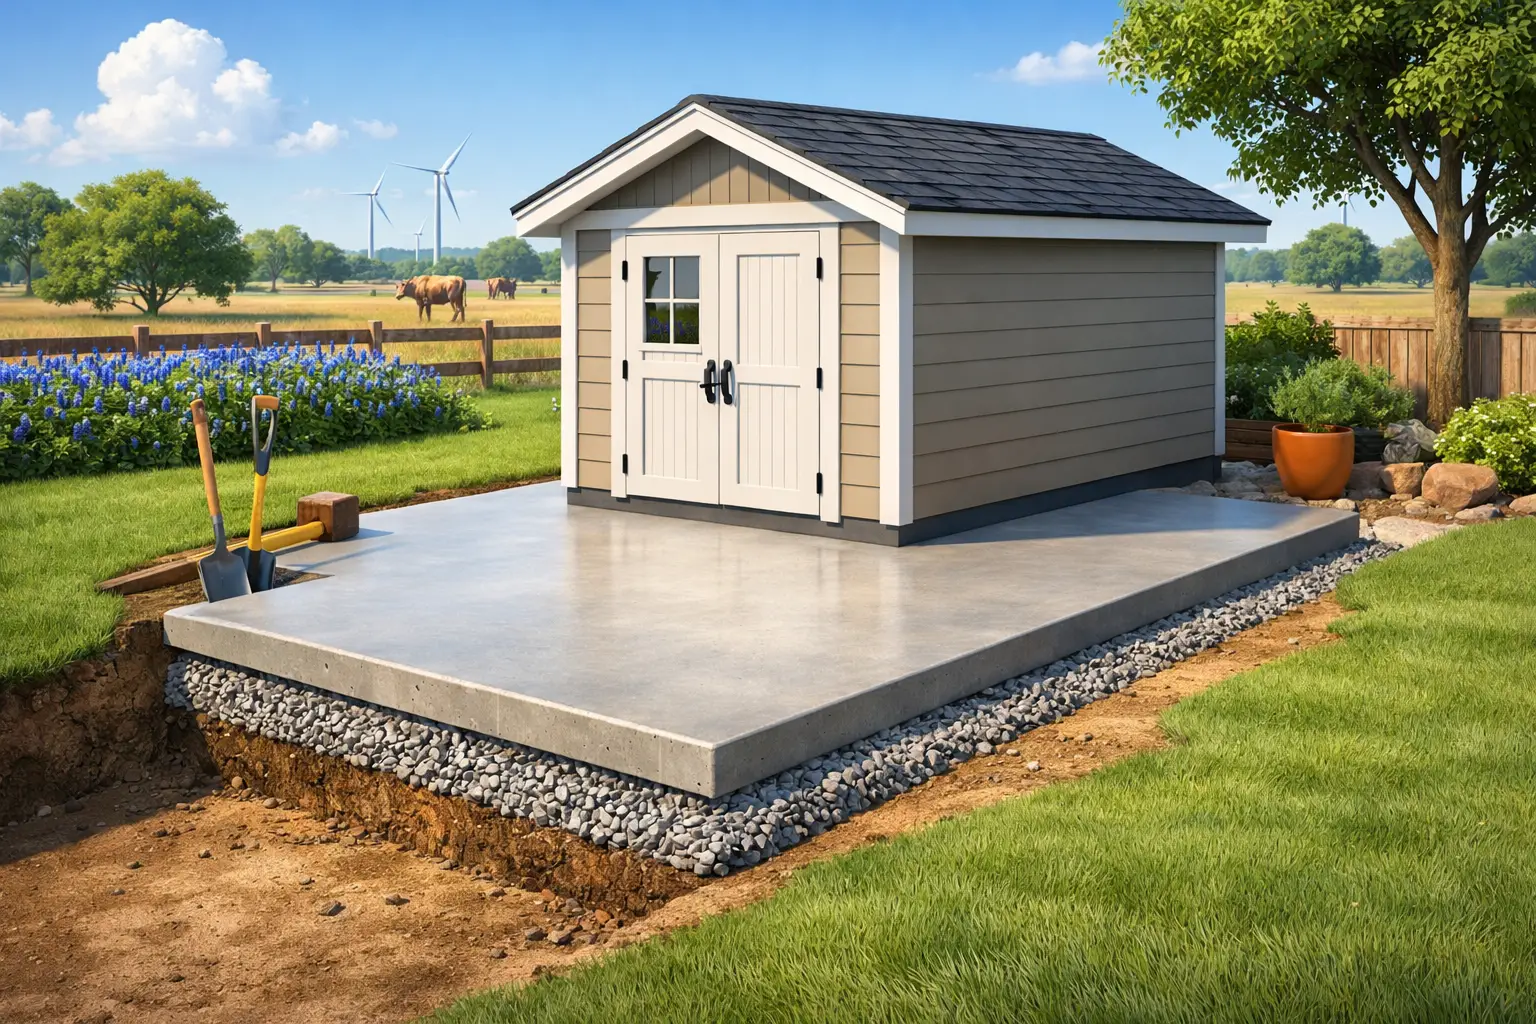
The visible slab is only part of the system. Under it, the soil needs to be prepared so the concrete has even, well-compacted support. Placing a pad directly over grass, loose fill, organic material, or soft soil invites settlement and cracking.
The work normally begins by removing vegetation and excavating to the required depth. The exposed subgrade is then evaluated and compacted. If weak material is present, it may need to be removed and replaced before the base is installed. This is especially relevant on properties where old fill, buried debris, or previous site work has left inconsistent ground conditions.
A compacted aggregate base provides a stable, drainable layer beneath the concrete. The required depth varies with soil conditions, pad size, and intended use, but the key point is compaction. A thick base that is not compacted correctly is not a reliable base. Material should be placed in manageable lifts and compacted with the proper equipment, not simply spread and covered.
Do Not Pour Over an Uneven Base
An uneven base creates uneven slab thickness. That can leave thin, weak areas exactly where the pad needs support. It also makes proper finishing more difficult and can lead to standing water after the concrete cures.
Professional layout and grading keep the pad at the designed elevation from edge to edge. Forms should be set securely, checked for square, and braced so they do not shift during placement. This is basic concrete work, but it is where a clean, dependable installation starts.
Choose the Right Thickness and Reinforcement
For a typical storage shed, a 4-inch concrete slab is often appropriate when it is installed over a properly prepared, compacted base. That does not make 4 inches the right answer for every job. A larger shed, heavy riding equipment, a tractor, a loaded utility trailer, or a workshop with concentrated equipment loads may call for a thicker pad or reinforced edges.
Reinforcement helps control cracking and adds support within the slab, but it does not replace proper site preparation. Wire mesh, rebar, and fiber reinforcement each have a purpose. The best choice depends on the design, expected loading, and conditions below the slab. Reinforcement must also be positioned correctly within the concrete, not left on the ground where it provides little benefit.
Concrete naturally shrinks as it cures, so some cracking is possible even on well-built work. Control joints are installed to encourage cracking along planned lines rather than randomly across the surface. A contractor should lay out those joints based on the pad dimensions and shape.
The pad may also need anchors for the shed. South Texas storms bring strong winds, and a shed is not safe simply because it is heavy. Anchor bolts, straps, or embedded hardware should be planned before the pour when possible, based on the shed supplier’s requirements and any applicable local rules.
Get the Finish and Edges Right
A shed floor does not need a decorative finish, but it does need a practical one. A light broom finish provides traction when the surface is wet. A slick, highly troweled surface can become slippery around lawn equipment, wet boots, and outdoor storage.
The edges deserve attention as well. A clean, properly finished edge is less likely to chip from normal use, and it gives the shed a better final appearance. Where equipment will repeatedly cross the slab edge, such as a mower entering through a double door, plan that transition carefully. A compacted approach, ramp, or adjusted grade can prevent the slab edge from taking repeated impact.
Concrete also needs time to gain strength. It should be protected and cured according to the placement conditions. Hot weather, wind, and direct sun can cause moisture to leave fresh concrete too quickly, which can affect the surface and increase the risk of cracking. Scheduling, curing methods, and finish timing matter during the South Texas heat.
Common Mistakes That Shorten a Shed Pad’s Life
Most shed pad failures can be traced to a few avoidable decisions. Watch for these problems before work begins:
- Pouring over grass, loose dirt, or an uncompacted base.
- Building the pad level in a yard that already holds water.
- Using a thin slab for a shed that will carry heavy equipment or vehicle loads.
- Skipping planned control joints, proper reinforcement placement, or required anchors.
- Installing the shed before the concrete has had adequate time to cure.
The lowest quote is not always the lowest-cost solution. If it leaves out excavation, base material, compaction, reinforcement, disposal, or grading, the price may only look better because critical work is missing. Ask what is included beneath the slab, how drainage will be handled, what thickness is proposed, and whether the quote accounts for access and site conditions.
When It Makes Sense to Hire a Concrete Contractor
A small pad can appear manageable, but the job becomes more involved when there is poor drainage, soft soil, restricted access, existing concrete to remove, utility concerns, or a large shed delivery to coordinate. Commercial storage buildings and high-use residential workshops also benefit from a more deliberate slab design.
A dependable concrete contractor can manage the work as one scope: demolition or clearing if needed, excavation, grading, base preparation, forming, reinforcement, placement, finishing, and cleanup. That matters when the goal is not simply to get concrete on the ground, but to build a pad that supports the shed for years.
Haylo Construction helps property owners across the Coastal Bend evaluate concrete pads based on the actual site, intended use, and drainage conditions. A clear estimate should explain the work being done and give you confidence that the foundation below your shed will not be an afterthought.
Before you order the shed or schedule delivery, have the pad location and requirements checked. A properly built slab gives you a level, dry, secure place to store what matters, and it prevents a small foundation decision from becoming a larger property problem later.