What Our Driveway Installation Process Looks Like From Start to Finish
Are you tired of looking at a cracked, sinking parking pad in front of your house? At Haylo Construction, we hear this constantly from homeowners across the Coastal Bend. Building a strong foundation for your vehicles is a significant undertaking. A lot of folks ask us exactly how to install concrete driveway surfaces that actually survive the harsh Texas heat and shifting coastal soils.
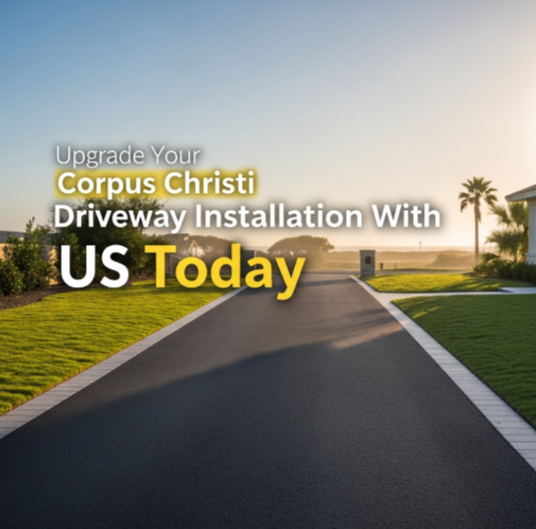
We believe in complete transparency. We want you to know exactly what goes into our work before we set foot on your property. This guide breaks down our entire concrete driveway installation process from the first phone call to the final curing day. Whether you live in Corpus Christi, Robstown, Victoria, Rockport, or Portland, we follow these exact steps to make sure your investment lasts a lifetime.
Step 1: Site Evaluation and Corpus Christi Building Permits
The secret to a perfect driveway concrete installation starts long before the first shovel hits the dirt. First, our team visits your property for a comprehensive site evaluation. We measure the space, check the soil type, and map out the location of underground utilities.
We also handle the red tape. Pulling the right Corpus Christi building permits is not optional. The city requires specific right-of-way and residential building approvals. Our team submits the necessary dimensioned site plans to you. This ensures everything we do meets strict local codes and prevents surprise fines.
If you need a concrete pathway installation or want to know how to install concrete slab patio additions, we can plan that out now. Proper planning guarantees a smooth residential concrete driveway installation without legal hiccups. We take the stress off your plate.
Step 2: Excavation and Subgrade Compaction
Once the city gives us the green light, the heavy lifting begins. If you have an old, broken surface, we tear it out and haul away the debris. If we are starting fresh, we excavate the topsoil. For a standard project, we dig down about 8 to 12 inches. Getting the depth right is crucial for proper concrete driveway preparation.
The dirt under your home, known as the subgrade, is the true foundation. Coastal Texas is notorious for shifting sandy or clay soils. If we poured a new driveway concrete mix directly on soft dirt, it would crack quickly. That is why we focus on subgrade compaction.
- We remove hidden tree roots and soft mud pockets.
- We use heavy plate compactors and rollers to press the native soil down.
- We test the ground to ensure it is incredibly dense.
Anyone who asks how to pour a concrete driveway needs to understand that the dirt underneath is just as important as the material on top.
Step 3: Laying a Bulletproof Aggregate Base
With the soil compacted, we move on to the next protective layer. We install a thick aggregate base to bridge the unpredictable coastal soil. This base is usually made of crushed stone or gravel. For a standard home, we lay down a 4 to 6-inch layer and compact it tightly using heavy machinery.
If you want a crushed concrete driveway installation, this base layer provides exceptional support for a solid slab above it. This gravel layer serves two major purposes:
- It gives the heavy slab a rigid, reliable place to rest evenly.
- It plays a massive role in proper surface drainage.
Water is the enemy of any foundation. The gravel allows underground moisture to drain away harmlessly instead of pooling up. Good drainage stops the ground from swelling or shrinking during heavy rainstorms. Creating a solid base is a mandatory step in the installation of a concrete driveway.
Step 4: Framing, Rebar, and Pouring 4000 PSI Concrete
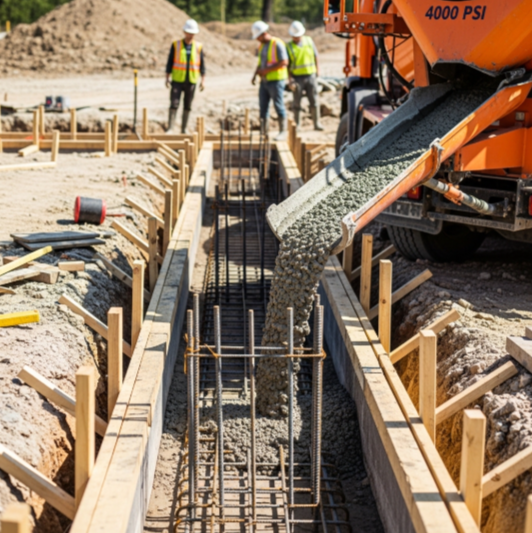
Now we shape the project. Forming a concrete driveway involves setting up sturdy wooden boards along the exact perimeter. These forms act like a mold. We secure them tightly with wooden stakes. We also set the proper slope. A flat surface will collect rainwater. We angle the forms to create a one-quarter-inch drop for every foot of distance. This slope forces water to run off the surface.
Next, we lay down a grid of steel rebar inside the forms. This metal skeleton gives the slab its incredible pulling strength. Then comes the main event. Pouring driveway concrete requires perfect timing. The concrete mixture for driveway projects matters immensely. We strictly use 4000 PSI concrete. This high strength rating means it easily handles the brutal summer sun and heavy vehicles.
- For regular passenger cars, we pour the slab 4 inches thick.
- If you park a heavy RV, we pour it 5 to 6 inches thick.
When people ask us how to make a concrete driveway last, using the strongest concrete for driveway use is our main answer. We ensure the concrete-pouring driveway phase is done quickly to prevent weak spots in the poured concrete driveway.
Step 5: Leveling, Broom Finishing, and Cutting Expansion Joints
As soon as the wet mix fills the forms, our crew jumps into action. We use long straight boards to level the top of the wet cement, a process called screeding. Then we use floating tools to push the coarse rocks down and bring the smooth paste to the surface. Knowing how to pour a concrete driveway is only half the battle. Knowing how to finish it is where craftsmanship shows.
Safety is a priority. A perfectly smooth surface becomes slippery when wet. To fix this, we apply a textured broom finish. We drag a specialized brush across the damp surface to create tiny ridges. This gives your tires perfect traction. This same technique is used when installing a concrete walkway.
Finally, we cut control joints into the surface. We slice these lines about one-quarter of the way through the depth of the slab, spacing them roughly every 10 feet. If the slab needs to crack from natural pressure, it will crack hidden deep inside these straight lines. This is a vital part of concrete driveway construction.
Step 6: The Curing Process for Texas Weather
The final step requires patience. Concrete curing time is the chemical process where the wet mix hardens and reaches its full structural strength. It needs moisture to cure properly. The hot Corpus Christi sun can dry out the surface too fast. We apply specialized curing compounds to trap the moisture inside the slab so it cures evenly.
So, how to do a concrete driveway correctly when it comes to waiting? You can safely walk on your new surface after 24 hours. However, you must wait a full 7 days before parking regular cars on the surface. During this first week, the material reaches about 70 percent of its total strength. It takes a full 30 days to reach its absolute maximum strength. Whether you are looking to make concrete driveway additions or to lay a concrete driveway from scratch, respecting the curing time is non-negotiable.
Why Trust Haylo Construction for Your Driveway Project?

We know you have options when it comes to hiring a contractor. Your home deserves a team that understands the unique challenges of the Texas Coastal Bend. We are a veteran-owned and operated company serving Corpus Christi, Aransas Pass, Mustang Island, Port Aransas, Sinton, and the surrounding areas. From pulling the correct city permits to pouring commercial-grade mixtures, our concrete driveway installation process is built on integrity and hard work. We handle every single detail so you never stress about the quality of your foundation.
If you are tired of patching cracks and want a permanent solution, let us help. We know exactly how to handle pouring driveway concrete to perfection. Contact us today at Haylo Construction to discuss your project and get a completely free estimate.